
The aesthetics of a home environment often have a profound impact on one’s mood and productivity. Among the various components that contribute to the look and feel of a room, baseboard heaters are not usually considered, though they present a significant visual element in the space.
These heaters, often overlooked, can transform from mere functional items to elements of design. Painting baseboard heaters is a cost-effective way of enhancing the room’s ambiance while maintaining the heater’s efficiency.
The simple act of painting baseboard heaters adds a personal touch to your space. With the right paint selection, the task is straightforward, offering an opportunity to revitalize a dull or rusty heater into an aesthetically appealing part of your decor.
Contents
Baseboard Heaters Painting: Basics
What are Baseboard Heaters?
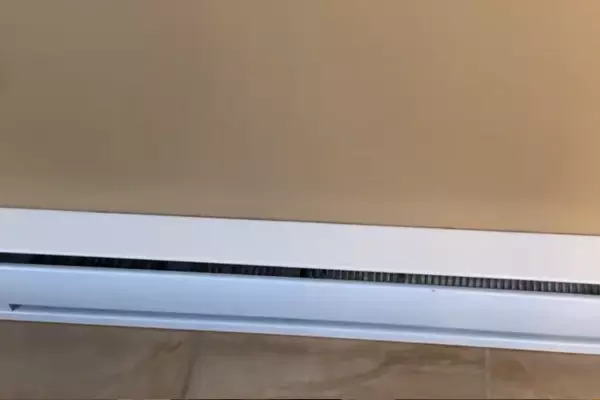
Baseboard heaters are a common sight in many homes, especially in areas with colder climates. They provide a convenient and efficient method of heating a room, operating either through electricity or heated water.
Why Paint Baseboard Heaters?
While baseboard heaters serve a functional purpose, they are also visible components of a room’s decor. Over time, they can become discolored, rusty, or simply outdated in their appearance. Painting them can restore their appearance and match them to the room’s color scheme, thus blending them seamlessly into the decor.
Can You Paint Baseboard Heaters?
The question, “Can you paint baseboard heaters?” often comes up when homeowners look at ways to spruce up their interiors. The answer is a resounding yes, with some caveats to ensure safety and aesthetics.
Advantages of Painting Baseboard Heaters
Painting your baseboard heaters has numerous advantages:
- Aesthetic Appeal: Painting your heaters can refresh their look and make them blend seamlessly with your room’s decor.
- Protection Against Rust: Paint forms a protective layer over the metal, reducing the risk of rusting and corrosion.
- Cost-Effective: It is a cost-effective way to upgrade the look of your heaters without replacing them.
Disadvantages of Painting Baseboard Heaters
There are also a few disadvantages to be aware of:
- Requires Regular Maintenance: Due to heat exposure, the paint may chip or peel over time, necessitating touch-ups.
- Preparation is Key: To achieve a smooth, professional-looking finish, the heaters need thorough cleaning and priming before painting.
Paint and Heat: The Connection
The connection between paint and heat is significant when painting baseboard heaters. Not all paint types can withstand the heat generated by these heaters. Using regular interior paint could lead to discoloration, peeling, and a strong, unpleasant smell when the heaters are operating.
Heat-resistant or high-heat paints are formulated to withstand high temperatures, making them an ideal choice for baseboard heaters. These paints not only resist peeling and discoloration but also emit fewer fumes when heated.
Paint Selection for Baseboard Heaters
The right paint selection is crucial to the success of your painting project.
Factors to Consider
Before you head to the paint store, consider the following factors:
- Heat Resistance: Opt for paints designed to withstand high temperatures without discoloring, chipping, or peeling.
- Color: Choose a color that matches or complements your room’s decor.
- Finish: High-gloss finishes tend to be more durable and easier to clean, while matte finishes can give a modern, sleek look.
- Durability: The paint should be able to withstand regular cleaning and dusting without fading or chipping.
Recommended Types of Paint
High-heat paints and acrylic latex paints are the top choices for baseboard heaters:
- High-Heat Paint: These are specially formulated to resist temperatures up to 1200 degrees Fahrenheit without losing color or finish.
- Acrylic Latex Paint: Acrylic latex paint is durable, easy to clean, and provides a smooth finish. However, it’s not as heat-resistant as high-heat paint, so it’s better suited for low-heat-output heaters.
Best Spray Paints for Baseboard Heaters
Spray paints are often preferred for painting baseboard heaters due to their ease of application and smooth, even finish. Here, we have reviewed two of the top products for spray painting baseboard heaters.
1. Rust-Oleum 7750830 High Heat Enamel Spray Paint

Highlighted Features:
- High heat resistance up to 1200°F.
- Oil-based formula provides long-lasting protection.
- No primer necessary for application.
- Fast-drying with excellent color retention after repeated heating.
Rust-Oleum’s High Heat Enamel Spray Paint is an exceptional solution for restoring or updating metal surfaces that experience high heat levels. With an elegant almond color, this product stands out for its remarkable durability and heat resistance of up to 1200°F, making it ideal for surfaces such as BBQ grills, stoves, radiators, and engines.
This oil-based paint is specifically designed to provide a lasting protective layer that prevents rust, with no primer necessary. The paint covers up to 8 sq. ft., which should be enough for many small projects. Its quick-drying nature (dry to touch in 30 minutes) is a significant advantage for those looking for a quick and easy painting solution.
Customer reviews indicate that this paint is not only high-performing but also reliable and consistent. Users report satisfaction with the paint’s adherence to surfaces, the quality of its finish, and its surprising resilience against heat and rust. The praise for Rust-Oleum’s customer service indicates the brand’s commitment to ensuring a great user experience.
- This paint’s heat resistance makes it suitable for various high-heat appliances.
- The oil-based formula offers impressive durability.
- Quick drying time is convenient for fast-paced projects.
- The color of the cap may not accurately represent the paint color, which could cause confusion.
- While it offers good coverage, you may need multiple cans for larger projects.
2. Rust-Oleum 1990502 Painter’s Touch Latex Paint
")
Highlighted Features:
- Versatile application across a variety of surfaces.
- Water-based acrylic formula is low odor and chip-resistant.
- High coverage and quick drying time.
- Flat finish excellently minimizes surface imperfections.
Rust-Oleum’s Painter’s Touch Latex Paint offers a highly versatile solution suitable for a variety of surfaces. This water-based acrylic paint is perfect for projects involving wood, metal, plaster, masonry, or unglazed ceramic. Its flat white finish is exceptional at hiding surface imperfections, giving a neat and clean appearance to your project.
This paint is impressive with its low odor and chip-resistant properties, which ensure the longevity of your painted surfaces. Moreover, it offers up to 120 sq. ft. of coverage and dries to the touch in 30 minutes, making it an efficient solution for both large and small projects.
According to customer reviews, this paint is exceptionally suitable for various DIY projects, ranging from touching up furniture to painting doors. Some users note that the paint may seem thicker than average, but this contributes to its excellent coverage and hiding capabilities.
- High versatility for different types of surfaces.
- Low odor and chip-resistant properties.
- Quick drying time and high coverage make it ideal for larger projects.
- The paint is reported to be thicker than average, which might make it harder to spread.
- The container may arrive bent, though this does not affect the paint itself.
Preparing Baseboard Heaters for Painting
Proper preparation is the key to a successful painting job. This includes cleaning the heaters and applying primer.
Cleaning Process
Dirt, dust, and grime can prevent the paint from adhering properly to the surface of your heaters. Therefore, a thorough cleaning is necessary:
- Turn off and unplug the heaters and let them cool.
- Use a vacuum cleaner with a brush attachment to remove loose dust and dirt.
- Wipe down the heaters with a damp cloth to remove any remaining dust or grime.
- For stubborn dirt or grease spots, use a mild detergent or a vinegar-water solution.
Sanding and Priming
Once your heaters are clean and dry, it’s time to sand and prime them:
- Lightly sand the surface to remove any loose paint or rust. This also creates a rough surface for the primer to adhere to.
- Wipe down the heaters again to remove the sanding dust.
- Apply a thin coat of primer designed for metal surfaces. The primer provides a base for the paint to stick to and increases the paint’s durability.
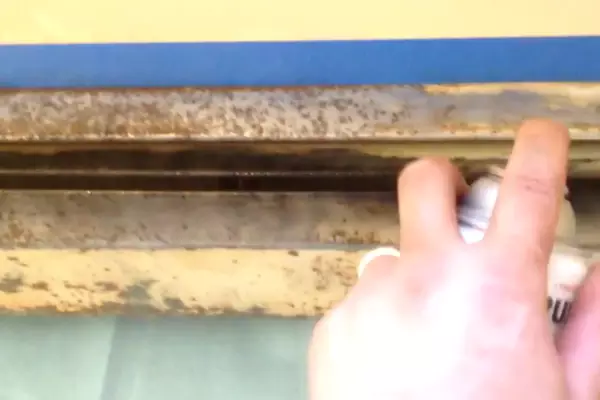
Painting Process Step-by-Step
Required Tools and Materials
Some tools and materials needed include high-heat spray paint, painter’s tape, sandpaper, and a primer suitable for metal surfaces.
Detailed Step-by-step Guide
- Turn off the heater and let it cool.
- Clean the heater surface thoroughly.
- Lightly sand the surface and wipe off the dust.
- Apply primer and let it dry.
- Apply the first coat of paint, let it dry, then apply a second coat if needed.
Maintenance Tips Post Painting
Regular Cleaning Tips
To maintain the newly painted baseboard heater, regular dusting and wiping are essential. Avoid using abrasive cleaning materials to prevent chipping the paint.
Ensuring Longevity of Paint
A protective clear coat can be applied after the paint has dried to enhance durability. Avoid placing objects that could scratch the paint near the heater.
Potential Pitfalls in Painting Baseboard Heaters
Common Mistakes to Avoid
Mistakes such as not cleaning the surface properly, skipping the primer, or not allowing sufficient drying time can lead to poor results. Ensure you follow the painting process diligently for a successful outcome.
Remedial Actions if Mistakes Happen
If mistakes occur, like paint drips or uneven coating, lightly sand the area and reapply the paint. If the paint chips or peels over time, touch up the affected areas following the same painting process.
Frequently Asked Questions
How Often Should I Repaint My Baseboard Heaters?
With high-quality paint and proper care, the paint job can last several years. However, touch-ups may be necessary if the paint chips or peels.
Can I Use Any Type of Paint for Baseboard Heaters?
Not all paints are suitable for baseboard heaters. High-heat or heat-resistant paints are recommended due to their ability to withstand the heat generated by the heaters.
Does Painting Baseboard Heaters Affect Their Efficiency?
No, painting baseboard heaters does not affect their efficiency, provided you use the appropriate type of paint and application method.
Conclusion
Painting baseboard heaters is a simple yet impactful way of enhancing your home’s aesthetics. The process, while straightforward, involves key steps that should be diligently followed to achieve a successful outcome.
The choice of paint plays a crucial role in this task, ensuring not just improved visual appeal but also durability. High-heat resistant paints and acrylic latex paints are commonly preferred for their lasting finish.
Finally, maintaining the newly painted baseboard heaters ensures their longevity. Regular cleaning, gentle handling, and touch-ups when needed help keep your baseboard heaters looking fresh and appealing for a long time.

How do cast iron floor baseboard heaters loose heat.
Thank you for your comment. Cast iron floor baseboard heaters lose heat through convection, which is the transfer of heat through air currents. As the heater warms up, it heats the surrounding air, which then rises and creates a current of warm air. This current carries the heat to other parts of the room. The cooler air then flows back toward the heater to be heated again. This process continues as long as the heater is on, resulting in a steady flow of warm air throughout the room. I hope this helps answer your question. Let me know if you have any further questions!