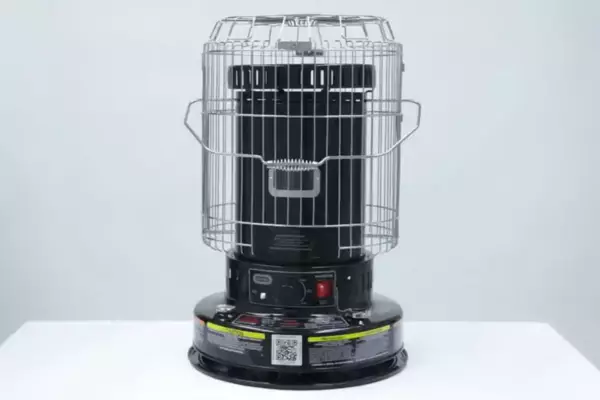
Kerosene heaters are a popular choice worldwide for their portability and energy efficiency. They provide essential heat during cold months, especially in areas where electric power may be unreliable. At the heart of these heaters lies a component called the wick, which plays a crucial role in their operation.
Proper wick adjustment is integral to the optimal performance of a kerosene heater. A correctly adjusted wick allows for clean, efficient burning and can significantly extend the lifespan of your heater. Improper wick adjustment, on the other hand, can result in insufficient heat output, excessive fuel consumption, and even potential safety hazards.
The importance of wick adjustment cannot be overstated. Mastering this skill allows you to keep your kerosene heater functioning optimally, ensuring it provides reliable warmth when you need it the most.
Contents
Basic Operation of a Kerosene Heater
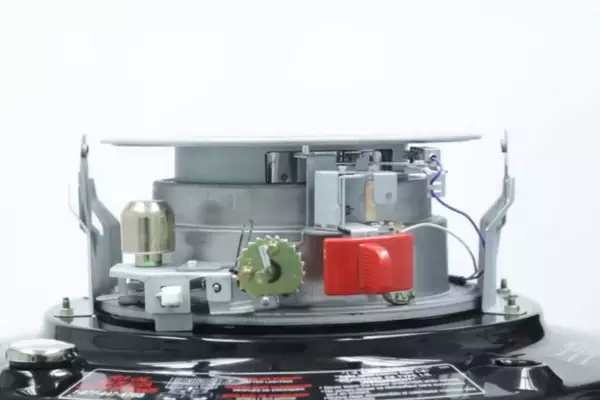
A kerosene heater operates on a principle similar to a large kerosene lamp. The essential parts of this mechanism include the fuel tank, wick, burner, and protective grill. The process hinges on the wick’s capacity to pull kerosene from the tank and channel it to the burner.
Mechanism of a Kerosene Heater
In the combustion chamber of a kerosene heater, the wick serves as a conduit for the fuel. This porous material absorbs kerosene from the tank and delivers it to the burner. Upon ignition, the kerosene vaporizes, and the ensuing flame provides warmth. The amount of heat generated correlates directly to the wick’s condition and its adjustment.

Importance of the Wick
The wick’s function is central to the heater’s operation. It ensures a steady supply of kerosene to the burner, enabling a consistent flame and efficient heat production. An evenly burned wick helps prevent soot formation, contributing to cleaner indoor air. Consequently, understanding the wick’s role and maintaining its optimal condition is vital to your heater’s efficiency.
Wick Replacement Process
A worn-out or clogged wick compromises your heater’s functionality. It leads to poor heat generation, difficulty in ignition, and can even be a fire hazard. Hence, regular wick inspection and timely replacement are important.
Indications for Wick Replacement
Several signs point to a deteriorated wick. A drop in heat output, despite a full tank, indicates the wick’s inability to draw enough kerosene. Trouble lighting up the heater, along with visible tar deposits or a frayed wick edge, also suggests a need for replacement. Excessive soot or foul odor during operation signifies incomplete combustion due to wick issues.
Steps to Install a New Wick
Replacing a wick involves a few simple steps. Ensure the heater has cooled down before you begin.
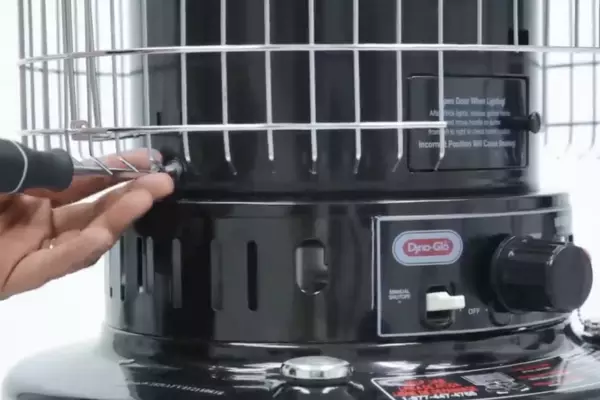
- Refer to the heater manual for specific instructions and remove the old wick.
- Position the new wick in the holder, ensuring it’s spread uniformly.
- Reinsert the wick holder, following the alignment indicators.
- Wait for a few minutes to let the wick saturate before using the heater.
Wick Adjustment
The height and evenness of your wick play key roles in your heater’s performance. A wick that’s set too high leads to a large, unsteady flame, generating unnecessary smoke and soot. Conversely, a low-set wick produces inadequate heat. Thus, proper wick adjustment is integral to maintaining an efficient, safe heater.
Signs of Improper Wick Adjustment
Common symptoms of a misadjusted wick include a weak flame, leading to low heat output. A sooty flame with a pungent smell may result from a too-high wick, causing incomplete combustion.

Step-by-step Guide to Adjust Wick
Adjusting the wick involves raising or lowering it to achieve the optimal flame height. The process should be done when the heater is off and cool to touch.
- Ensure the fuel tank isn’t filled to capacity to avoid accidental spills.
- Open the fuel cap and slowly raise the wick.
- Examine the wick from the top. The wick edge should appear level.
- If it’s uneven, use a wick adjuster or similar tool to level it out.
- Once adjusted, lower the wick and refit the fuel cap.
“Kerosene Heater Wick Won’t Raise” Issue and Solutions
If you encounter resistance while raising the wick, it could be due to tar build-up, mechanical issues, or a worn-out wick.
- Try cleaning the wick with a soft brush to remove any accumulated tar.
- Ensure the wick raising mechanism isn’t jammed.
- Consider replacing the wick if it’s old or visibly degraded.
Setting the Flame Height
Just like the wick height, the flame height impacts your heater’s efficiency and safety. An ideal flame height ensures adequate heat production without excessive fuel consumption or risk of overheating.
Role of Flame Height
Flame height correlates directly with heat output and fuel consumption. A properly adjusted flame offers the best balance between warmth and economy, ensuring your heater delivers optimum performance.
Flame Adjustment Guidelines
To set the flame height:
- Use the heater’s adjustment knob or dial.
- The flame should appear vibrant blue, with no black or sooty patches.
- If the flame seems dull, the wick may be set too low.
- If the flame flickers or produces soot, the wick could be too high.
Addressing “Kerosene Heater Flame Height” Issues
If your heater’s flame seems erratic or inefficient, the first step is to check the wick. Ensure it’s clean, properly adjusted, and not excessively worn. If wick adjustment doesn’t solve the problem, it might be time for a wick replacement.
Dry Burning the Wick
Dry burning is a useful technique to clean your wick and improve its longevity. It involves burning the wick without fuel to eliminate impurities that accumulate over time.

What is Dry Burning?
Dry burning is essentially a wick cleaning method. It involves burning the wick in absence of fuel, allowing the heat to break down tar and other deposits.
Procedure for Dry Burning a Kerosene Heater Wick
- Drain the fuel tank completely.
- Light the heater and let it burn until the wick is thoroughly dry.
- Make sure to monitor the process closely to prevent overheating or other hazards.
Benefits and Precautions
Dry burning can prolong your wick’s lifespan and enhance heater efficiency. However, it’s important to exercise caution. Ensure you’re in a well-ventilated area, and keep an eye on the heater to avoid overheating.
Routine Kerosene Heater Maintenance
Proactive and regular maintenance is the key to a well-performing kerosene heater. This involves regular cleaning, wick inspections, flame checks, and safety audits.
Cleaning and Safety Checks
Regularly clean your heater to prevent dust accumulation which could impede airflow. Check for any signs of wear, rust, or damage that might affect safety or performance.
Wick Maintenance Tips
Inspect the wick frequently for any build-up or fraying. Clean it periodically, and adjust or replace as necessary to ensure optimal performance.
Maintaining Flame Quality
Monitor the flame quality and adjust the wick height as needed. A good flame should be steady, bright blue, and relatively smoke-free.
Troubleshooting Common Issues
Kerosene heaters are generally reliable, but like any appliance, they can have issues. Knowing how to troubleshoot common problems can save you time and money.
“How to Work a Kerosene Heater” – Basic Troubleshooting Guide
If your heater isn’t working as it should, try checking the wick adjustment, the fuel level, and the cleanliness of the heater. If these steps don’t solve the problem, consult the manufacturer’s manual or contact a professional.
Addressing Common Problems
Common issues with kerosene heaters include low heat output, difficulty in lighting, and excessive soot. These problems can often be resolved by adjusting the wick, cleaning the heater, or replacing the wick.
When to Seek Professional Help
If you’ve tried troubleshooting and your heater still isn’t working properly, it may be time to seek professional help. Some issues, such as faulty parts or complex mechanical problems, should be handled by a professional.

